
# DIY Panic Button with Siren: Empower Your Smart Home Safety with SONOFF MINIR4
In an unpredictable world, having a quick, reliable way to call for help can make all the difference. Enter the **panic button with siren**—a simple yet powerful emergency alert system that you can build right into your smart home. Today, we're diving into a straightforward DIY solution using the **SONOFF MINIR4 Smart DIY Switch**. This compact WiFi relay is perfect for triggering a 220V AC siren from a momentary panic button, all while integrating seamlessly with your voice assistants like Alexa, Google Home, or Alice. Whether you're in a bustling city like Pune or anywhere else, this setup adds peace of mind without breaking the bank.
If you're new to smart home tinkering, don't worry—this guide is beginner-friendly. We'll cover everything from wiring (with diagrams) to app configuration. For official specs, terminal details, and more, check out the [SONOFF MINIR4 documentation](https://help.sonoff.tech/docs/minir4).
## Why a Panic Button with Siren? The Smart Home Edge
Traditional panic buttons often rely on batteries or complex wiring, but a smart version like this one leverages WiFi for remote monitoring and automation. Imagine pressing a button to blast a deafening siren *and* send alerts to your phone, neighbors, or even emergency services via integrations. It's ideal for homes with elderly family members, kids, or anyone who wants an extra layer of security.
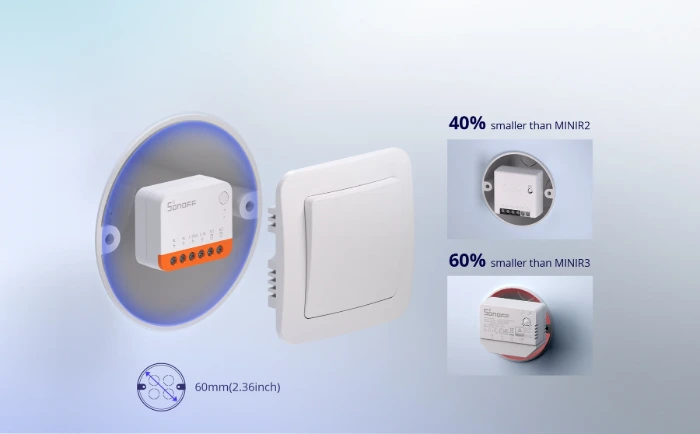
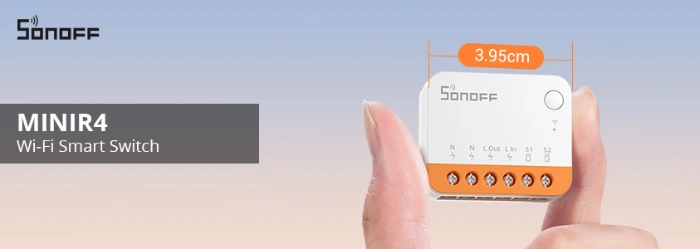
The star of our setup? The **SONOFF MINIR4**—a mini extreme relay that's tiny enough (just 39.5x33x16.8mm) to fit into standard wall boxes, yet powerful enough to handle up to 10A/2400W loads. Key features that make it siren-ready:
- **WiFi 2-Way Control**: Toggle the relay remotely via the eWeLink app or voice commands.
- **External Switch Support**: Connects to momentary buttons (like a panic switch) via S1/S2 terminals.
- **Detach Relay Mode**: Lets the button trigger actions without messing with the relay's state—perfect for one-touch alerts.
- **Smart Scenes & Timers**: Automate the siren to blare for a set duration (e.g., 30 seconds) then auto-off.
- **Compatibility**: Works with SONOFF R5 (as a sub-device for wireless remotes), S-MATE sensors, Alexa, Google Home, and more. No hub needed—just your home WiFi.
Rated for 100-240V AC (50/60Hz), it's built for global use, including 220V setups common in India.
## What You'll Need: Materials List
Gather these essentials before starting:
- **SONOFF MINIR4 Smart DIY Switch** (available on WWW.SONOFF.IN/
WWW.SONOFF.TECH)
- **220V AC Siren** (e.g., a 100-110dB emergency siren; ensure it's rated for continuous short bursts to avoid overheating).
- **Momentary Push Button Switch** (dry contact type, like a red panic button or doorbell button—no power needed on the button itself).
- **Wires**: 16-14AWG solid or stranded copper (keep external switch wiring under 20m).
- **Tools**: Screwdriver, wire strippers, multimeter (for testing).
- **Smartphone**: With the free eWeLink app (iOS/Android).
- **Optional**: SONOFF R5 remote for wireless button extension, or S-MATE door sensor for automated triggers.
**Pro Tip**: Always use a 10A MCB or RCBO breaker for safety. This isn't waterproof, so keep it indoors.
## Step-by-Step Setup: From Box to Blasting Siren
### Step 1: Power Down and Wire It Up
**Safety first**—turn off your mains power at the breaker and verify with a multimeter. The MINIR4 installs in a flush-mounted wall box
**Important Warnings (from official docs)**:
- Install and maintain by a professional electrician if you're not qualified.
- Never touch terminals while powered on—risk of electric shock.
- Do **not** connect S1/S2 to neutral (N) or ground—can damage the device or cause danger.
- Enclose fully in a box with cover plate; indoor use only.
- Install a 10A MCB/RCBO before the MINIR4.
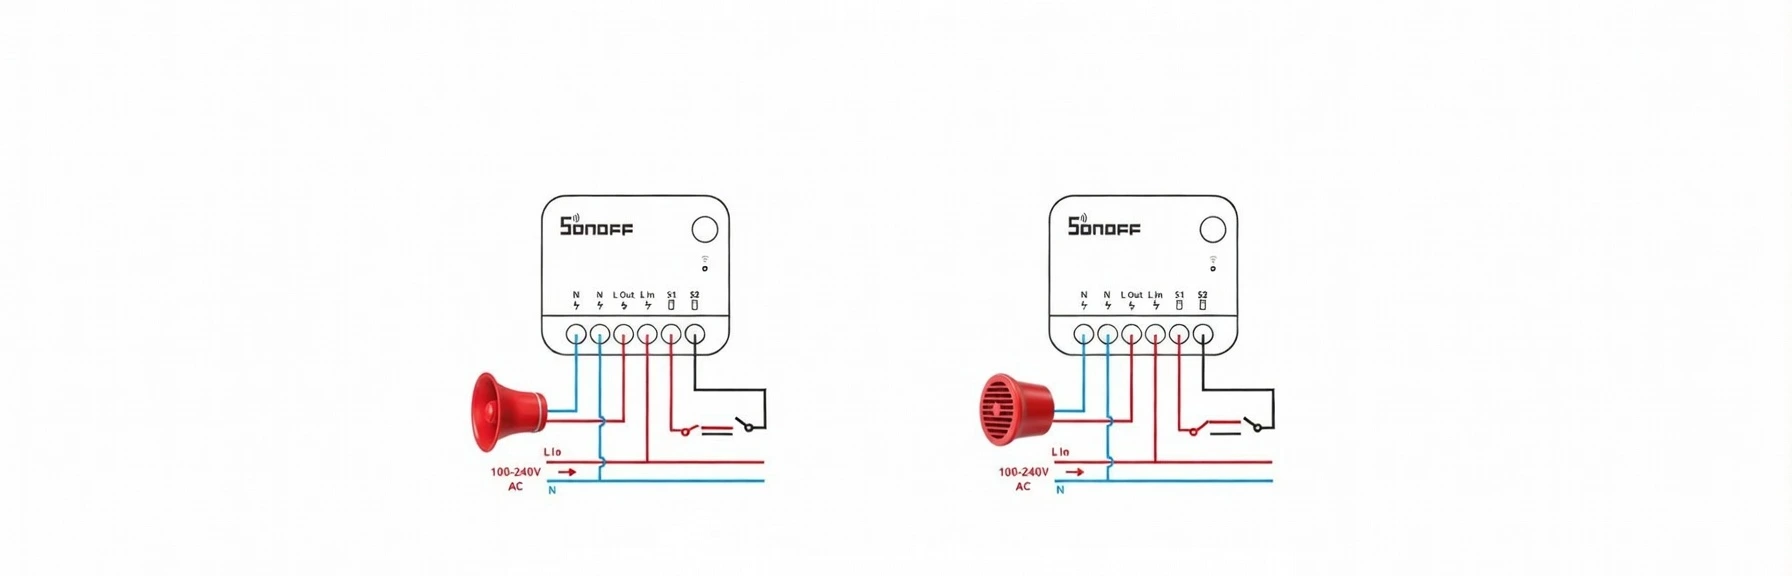
#### Basic Relay Wiring for the Siren (Load Control)
This powers the MINIR4 continuously and lets it switch the 220V siren on/off.
Textual Diagram (Standard Load Wiring):
```
Mains Power ───┬──── Live (L / Phase) ───► L In
│
└──── Neutral (N) ───────► N (Input)
│
├──── N (Output) ───► Siren ─ (one terminal)
│
MINIR4 Device ─────────────────────────────┼──── L Out ───────► Siren + (other terminal)
```
- Live wire from mains → **L In**
- Neutral from mains → **N** (input side; often bridged internally to output N)
- Siren live input → **L Out**

- Siren neutral → **N** (output side)
This is the classic single-pole switch setup: the relay interrupts the live line to the siren.
#### Panic Button Wiring (Momentary / Dry Contact)
Connect your red panic push button here—no voltage on these wires!
Textual Diagram (Momentary Button for Panic Trigger):
```
Panic Button (Momentary, normally open)
┌───────────────┐
│ │
└────── Wire ───► S1
│
└────── Wire ───► S2
```
- One terminal of the momentary button → **S1**
- Other terminal → **S2**
- The button is a simple dry contact—no live or neutral connected to S1/S2!
When pressed, it shorts S1 to S2 briefly, which the MINIR4 detects as a trigger.
**Combined Full Wiring Example (Recommended for Panic Setup)**:
```
Mains ── Live ──► [10A MCB] ──► L In ── MINIR4 ── L Out ──► Siren Live
Mains ── Neutral ────────────────────────────────► N ─────► Siren Neutral
Panic Button:
Button Terminal 1 ──► S1
Button Terminal 2 ──► S2
```
For full visual references and any updates, refer directly to the [official MINIR4 help page](https://help.sonoff.tech/docs/minir4), which includes terminal illustrations.
### Step 2: Pair with the eWeLink App
1. Download the eWeLink app and log in.
2. Tap "+" to add device, scan QR on MINIR4 or search.
3. Press/hold button 5 seconds (LED flashes: two short + one long).
4. Connect to your 2.4GHz WiFi.
### Step 3: Configure for Panic Mode
In the app → Device Settings:
- **External Switch** → Enable **Detach Relay Mode** (recommended for panic: button press triggers scene without toggling relay state directly).
- **Switch Mode** → **Pulse** or **Edge** (single short press = trigger; ideal for momentary panic button).
- **Inching** → Set auto-off timer (e.g., 30–60 seconds) so siren stops automatically.
- Power-on state → "Off" to avoid accidental activation.
### Step 4: Create Smart Scenes for Instant Alerts
1. In eWeLink → **Scene** → Add.
2. **If** (Trigger): "External switch [Click]" (appears when Detach Relay is on).
3. **Then** (Action): Turn MINIR4 "On" → siren activates.
4. Add delay/timer for auto-off.
5. Extras: Phone push notification, IFTTT for SMS, or voice ("Alexa, trigger panic!").
For wireless panic: Pair with SONOFF R5 as sub-device.
### Step 5: Test and Integrate
- Press panic button → Siren sounds, app notifies.
- Voice test: "Hey Google, turn on the siren."
- Check app logs for issues.
## Safety First: Essential Warnings
- Professional installation recommended, especially for 220V AC in India.
- Max 10A resistive load (sirens ok; avoid heavy motors).
- Indoor, enclosed use only.
- S1/S2 low-voltage only—no mains connection.
## Wrapping Up: Your Home, Safer and Smarter
With the SONOFF MINIR4, a simple button becomes a powerful siren trigger—affordable, expandable, and smart. Start small, stay safe, and enjoy the peace of mind.
Ready to build? Grab your MINIR4 and review the [full documentation](https://help.sonoff.tech/docs/minir4) for tweaks. Share your setup or questions in the comments!
*This post is for educational purposes. Always follow local electrical codes and prioritize safety.*